


In “GitHub for the rest of us” I argued that GitHub’s superpowers could serve everyone, not just coders. Ever since then (2015) I’ve felt that I overstated the case. GitHub was, and remains, a tool that is deeply optimized for programmers who create and review versioned source code. Other uses are possible but awkward, and the tools that I thought could make GitHub friendlier to non-coders mostly haven’t arrived.
Recently, though, I’ve been revisiting what GitHub can do for non-coders. As I’ve helped colleagues write blog posts and documentation I’ve been reflecting on my editing process and reaching for tools that can help me narrate the principles that guide it.
I have long imagined a tool that would enable a teacher to help students learn how to write and edit. In “Thoughts in motion” I explored what might be possible in Federated Wiki, a writing tool that keeps version history for each paragraph. I thought it could be extended to enable the kind of didactic editing I have in mind, but haven’t yet found a way.
More recently, in “How to write a press release,” I tried bending Google Docs to this purpose. To narrate the process of editing a press release, I dropped a sample release into a GDoc and captured a series of edits as named versions. Then I captured the versions as screenshots and combined them with narration, so the reader of the blog post can see each edit as a color-coded diff with an explanation.
The key enabler is GDoc’s File -> Version history -> Name current version, along with File -> See version history’s click-driven navigation of the set of diffs. It’s easy to capture a sequence of editing steps that way.
But it’s much harder to present those steps as I do in the post. That required me to make, name, and organize a set of images, then link them to chunks of narration. It’s tedious work. And if you want to build something like this for students, that’s work you shouldn’t be doing. You just want to do the edits, narrate them, and share the result.
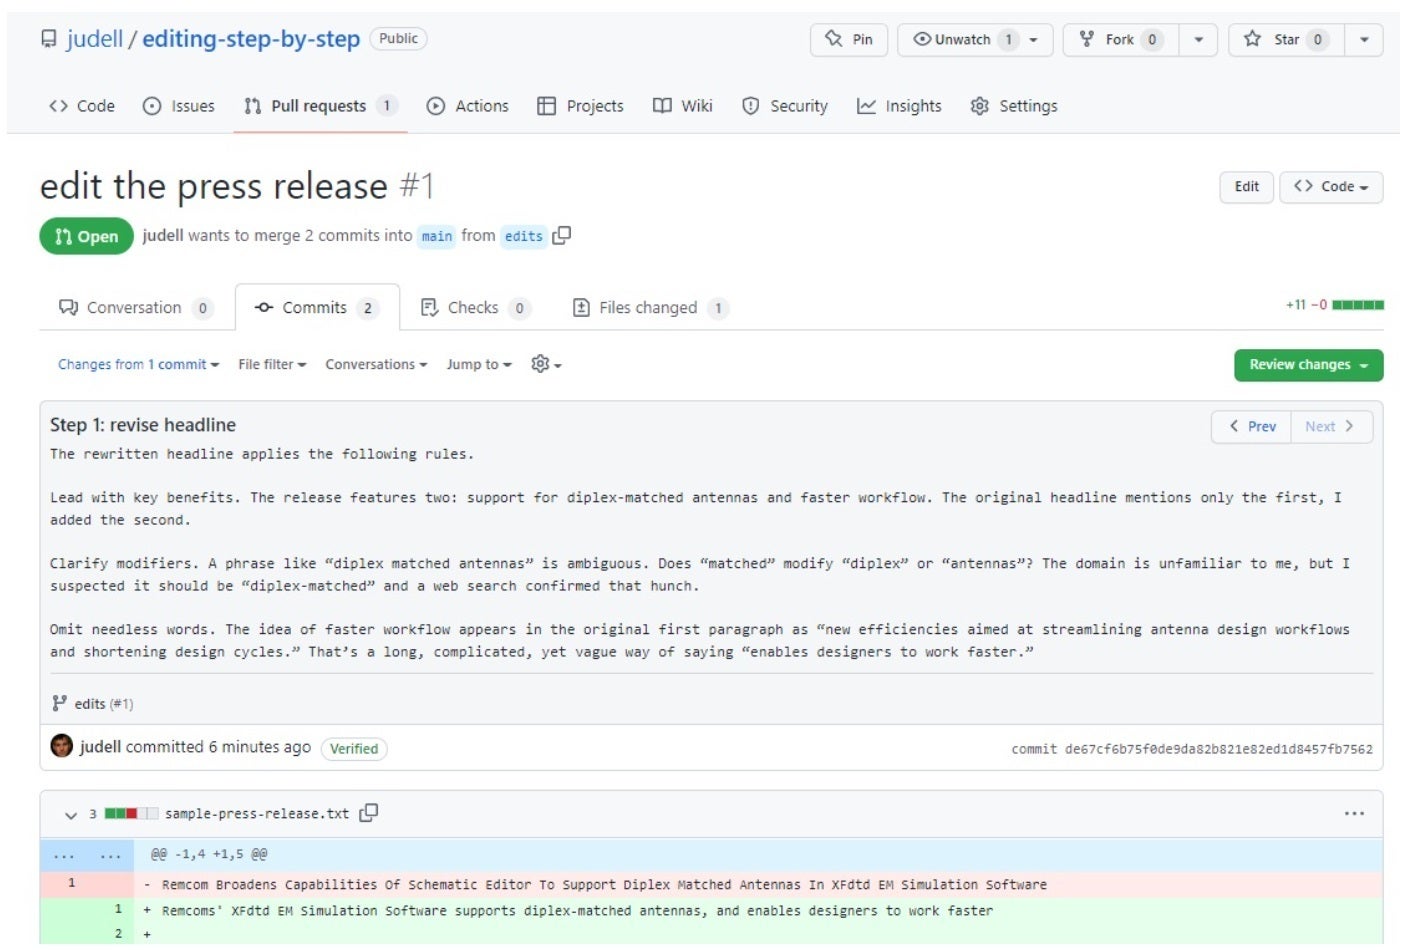
Why doesn’t the built-in change-tracking in GDoc (or the equivalent in Word) meet the need? In those modes, changes and commentary appear in document order. But the editing process doesn’t happen that way. When editing that sample press release, for example, I revised the headline in Step 1 and explained my rationale there. Then, in a later step, while editing the third paragraph, I saw that it demanded a revision to the headline. So I made another change to the headline, and again explained the rationale. The presentation I built for the blog post preserves that sequence, and I think that’s critical. Edits don’t necessarily happen in top-down document order, and narration of them shouldn’t either. The narration should tell the story as it actually happens: moving around in the document, revisiting the same passage several times for different reasons.
More recently I tried a GitHub-based alternative to that GDoc technique. Again the goal was not only to produce an edited version, but also to narrate the edits in a didactic way. I put the original doc in a repository, made step-by-step edits in a branch, and created a pull request. We were then able to review the pull request, step through the changes, and review each as a color-coded diff with an explanation. No screenshots had to be made, named, organized, or linked to the narration. I could focus all my attention on doing and narrating the edits. Perfect!
Well, perfect for someone like me who uses GitHub every day. If that’s not you, could this technique possibly work? Let’s recreate my Google Docs example in GitHub and see how it goes. Pretend that you aren’t a coder, have never used GitHub, and don’t know (or want to know) anything about branches or commits or pull requests. But you would like to be able to create a presentation that walks a learner though a sequence of edits, with step-by-step narration and color-coded diffs. At the end of this tutorial you’ll know how to do that. I’ll describe the recipe carefully so you can try it for yourself and decide whether it’s practical. Or better yet, ask a friend who is an English teacher to do the experiment!
This screencast shows the final result of the technique I’ll describe. You’ll see me clicking Next, in a review of a GitHub pull request, to step through a sequence of narrated edits.
If you want to replicate that, and you don’t already have a GitHub account, create one now and log in.
Ready to go? OK, let’s get started.
Step 1: Create a repository
Click the + button in the top right corner, then click New repository.
 IDG
IDGHere’s the next screen. All you must do here is name the repository, e.g. editing-step-by-step, then click Create repository. I’ve ticked the Add a README file box, and chosen the Apache 2.0 license, but you could leave the defaults — box unchecked, license None — as neither matters for our purpose here.
 IDG
IDGStep 2: Create a new file
On your GitHub home page, click the Repositories tab. Your new repo shows up first. Click its link to open it, then click the Add file dropdown.
 IDG
IDGStep 3: Create a new branch, commit the change, and create a pull request
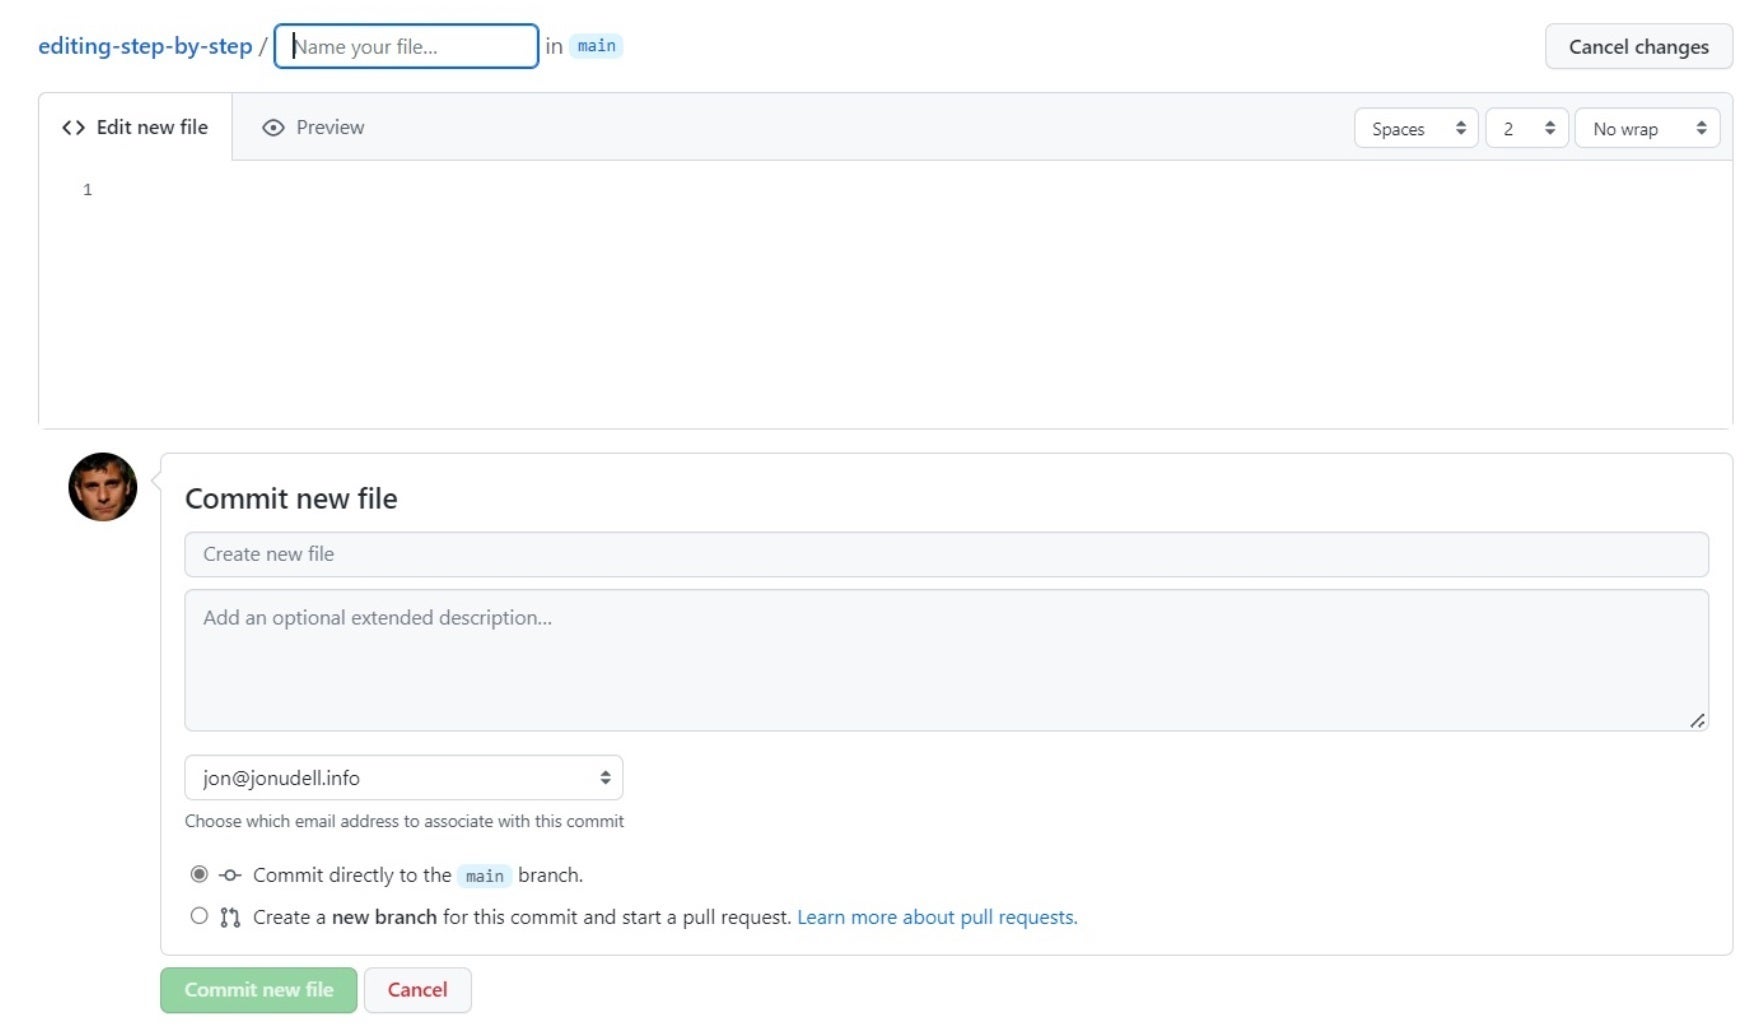
What happens on the next screen is bewildering, but I will spare you the details because I’m assuming you don’t want to know about branches or commits or pull requests, you just want to build the kind of presentation I’ve promised you can. So, just follow this recipe.
- Name the file (e.g.
sample-press-release.txt - Copy/paste the text to review into the edit box
- Select
Create a new branch for this commit and start a pull request - Name the branch (e.g.
edits) - Click
Propose new file
 IDG
IDGOn the next screen, title the pull request (e.g. edit the press release) and click Create pull request.
 IDG
IDGStep 4: Visit the new branch and begin editing
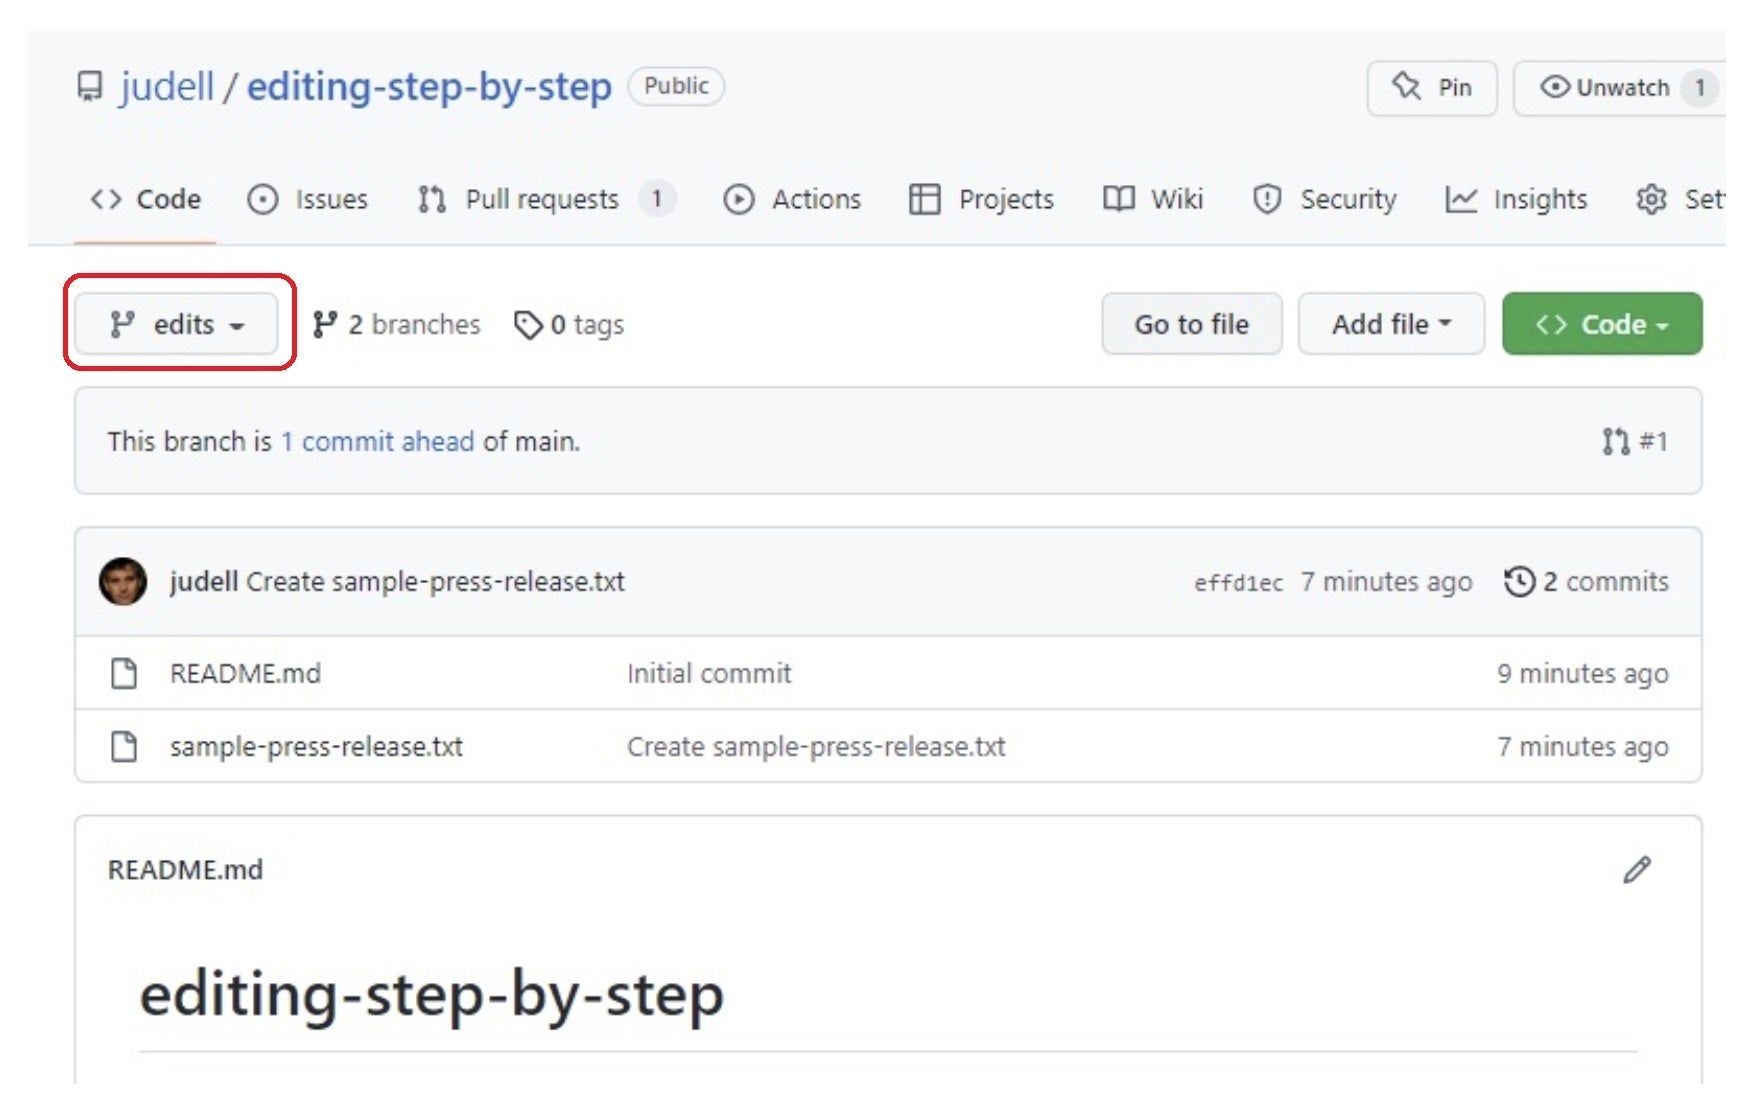
On the home page of your repo, use the main dropdown to open the list of branches. There are now two: main and edits. Select edits.DG
 IDG
IDGOn the next screen, confirm that you are on the edits branch.
 IDG
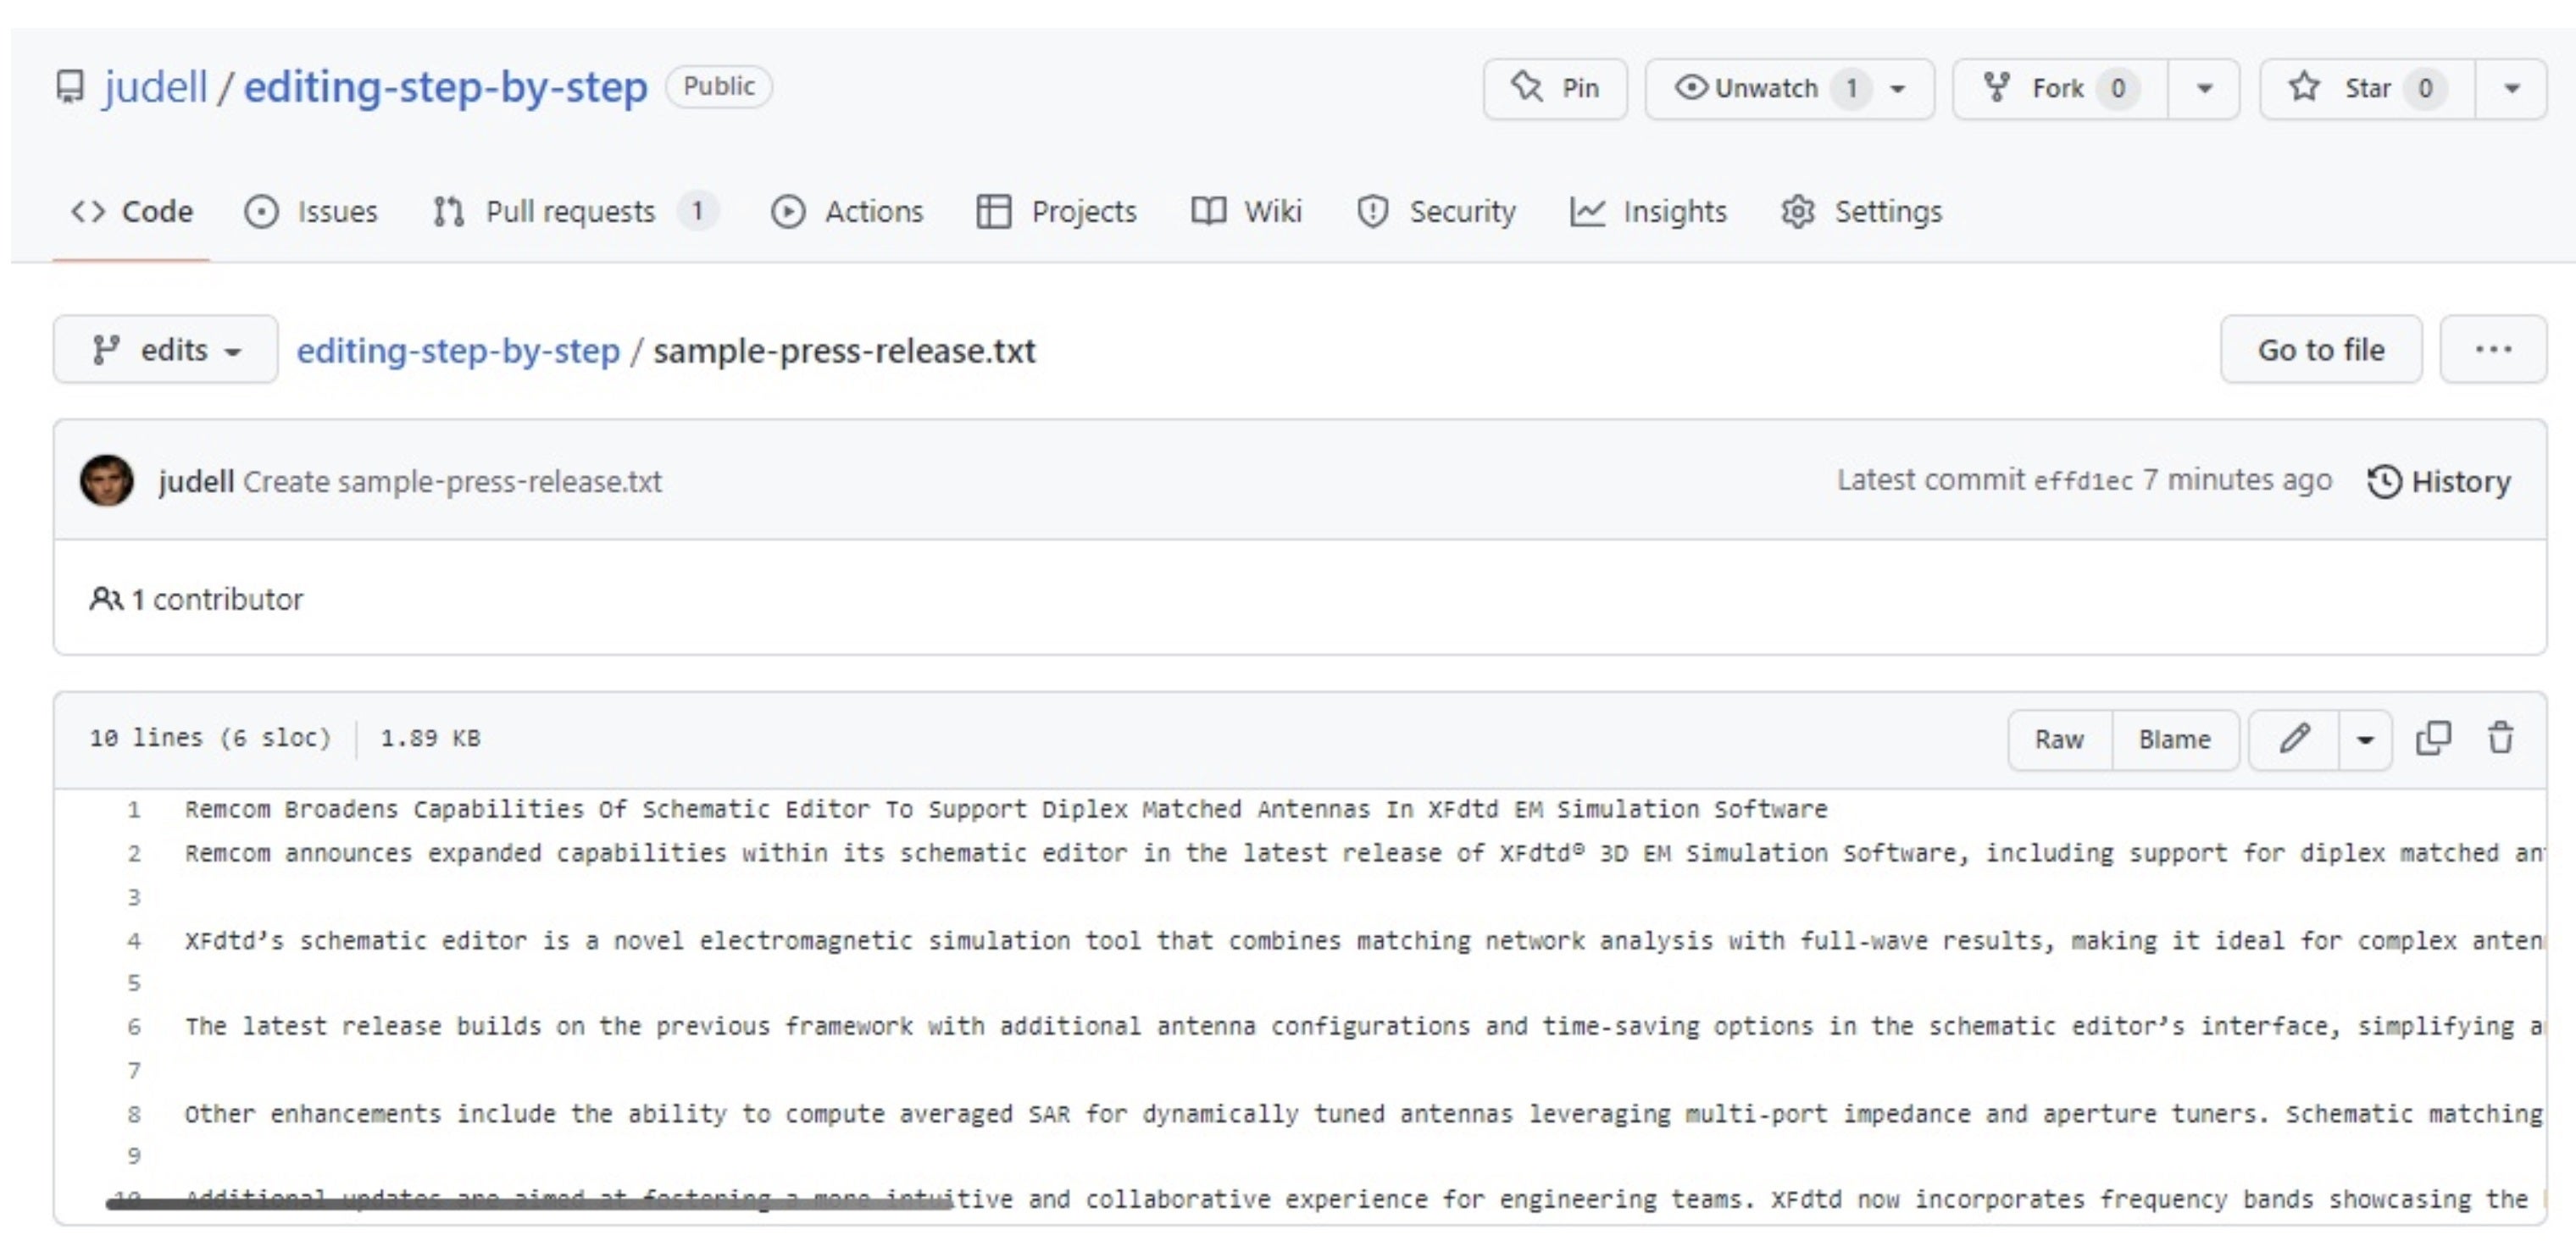
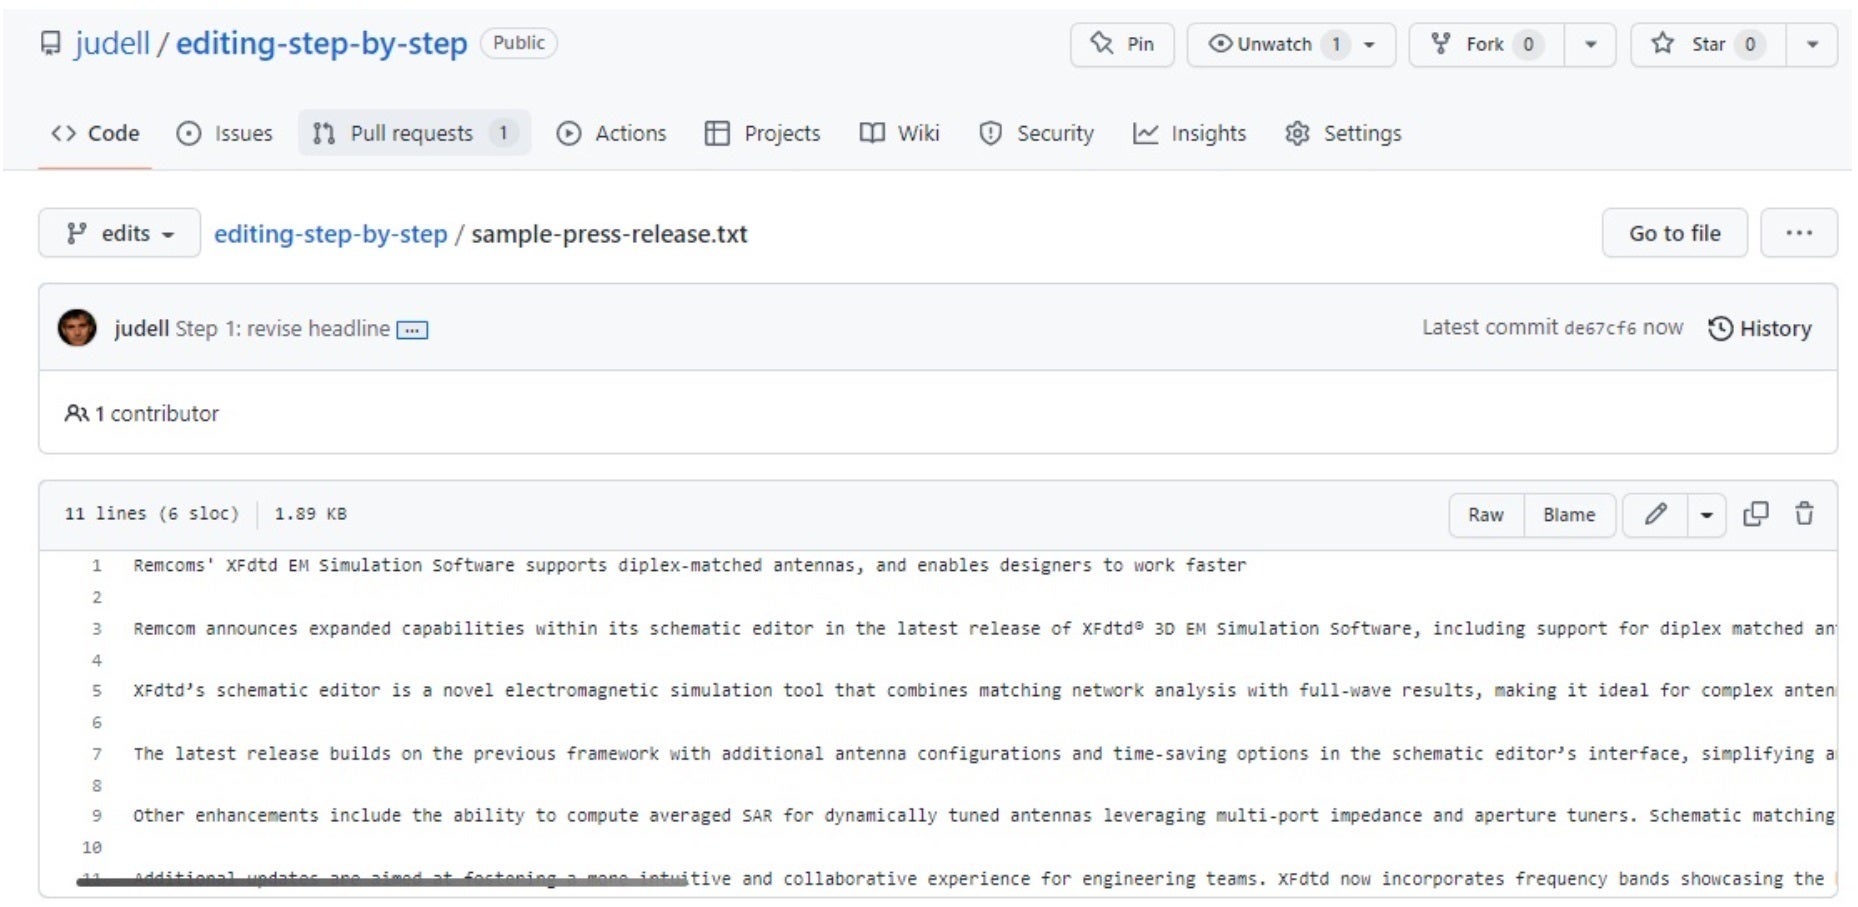
IDGClick the name of the document you created (e.g. sample-press-release.txt to open it.
 IDG
IDGClick the pencil icon’s dropdown, and select Edit this file.
 IDG
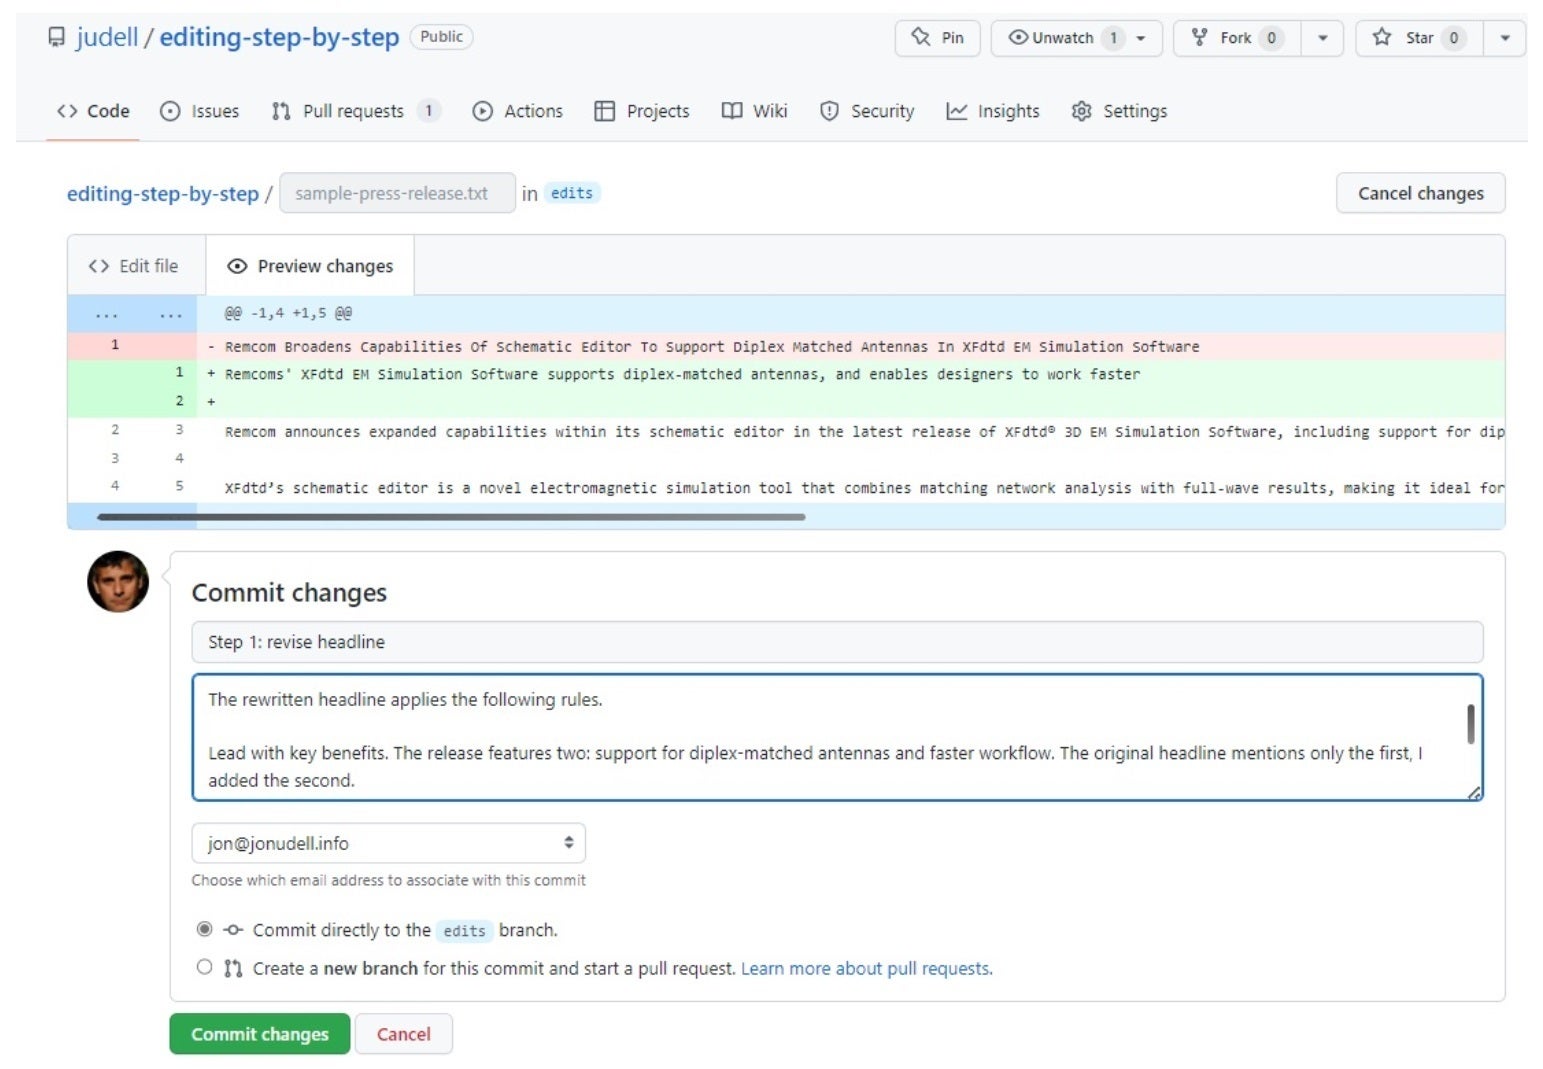
IDGMake and preview your first edit. Here, that’s my initial rewrite of the headline. I’ve written a title for the commit (Step 1: revise headline), and I’ve added a detailed explanation in the box below the title. You can see the color-coded diff above, and the rationale for the change below.
 IDG
IDGClick Commit changes, and you’re back in the editor ready to make the next change.
 IDG
IDGStep 5: Visit the pull request to review the change
On your repo’s home page (e.g. https://github.com/judell/editing-step-by-step), click the Pull requests button. You’ll land here.
 IDG
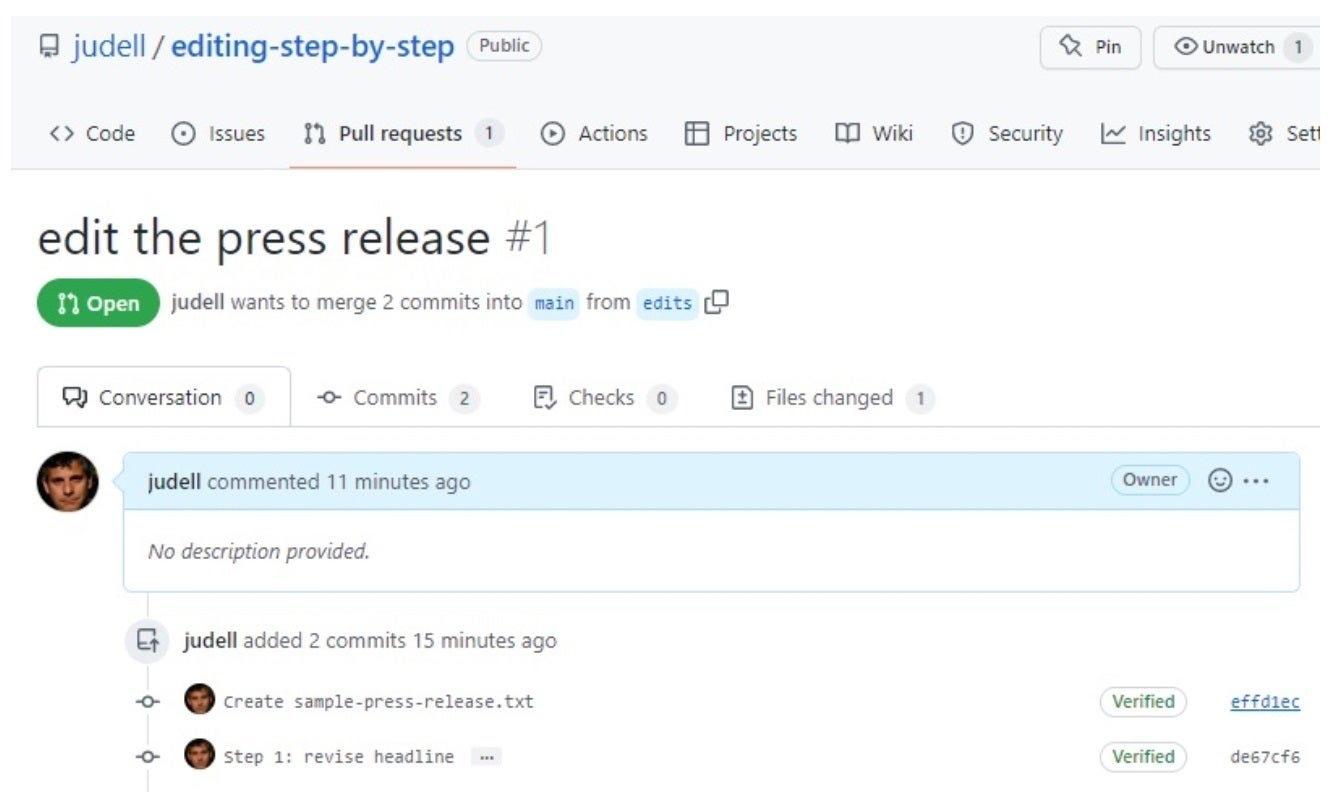
IDGClick the name of the pull request (e.g. edit the press release) to open it. In the rightmost column you’ll see links with alphanumeric labels.
 IDG
IDGClick the first one of those to land here.
 IDG
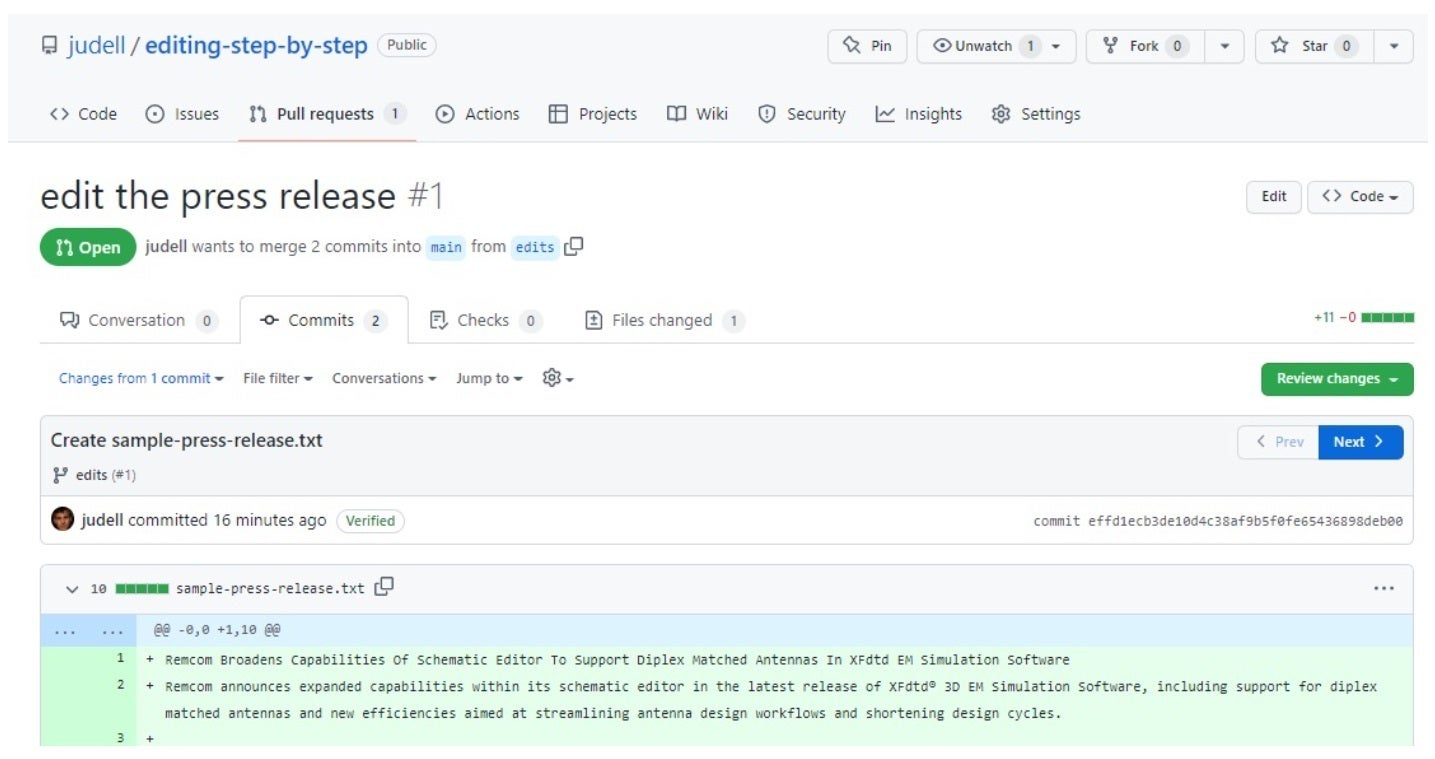
IDGThis is the first commit, the one that added the original text. Now click Next to review the first change.
 IDG
IDGThis, finally, is the effect we want to create: a granular edit, with an explanation and a color-coded diff, encapsulated in a link that you can give to a learner who can then click Next to step through a series of narrated edits.
Lather, rinse, repeat
To continue building the presentation, repeat Step 4 (above) once per edit. I’m doing that now.
... time passes ...
OK, done. Here’s the final edited copy. To step through the edits, start here and use the Next button to advance step-by-step.
If this were a software project you’d merge the edits branch into the main branch and close the pull request. But you don’t need to worry about any of that. The edits branch, with its open pull request, is the final product, and the link to the first commit in the pull request is how you make it available to a learner who wants to review the presentation.
GitHub enables what I’ve shown here by wrapping the byzantine complexity of the underlying tool, Git, in a much friendlier interface. But what’s friendly to a coder will likely still overwhelm an English teacher. I can absolutely envision tooling wrapped around the GitHub API that would make this technique simpler for teachers and learners focused on the craft of writing and editing.
Meanwhile, though, it’s possible to use GitHub to achieve a pretty good result. Is it practical? That’s not for me to say. I’m way past being able to see this stuff through the eyes of a beginner. But if your English-teacher friend wants to give this a try, I would love to know whether they’re able to follow this recipe, and if so whether they think it can help them help learners become better writers and editors.