


Blitz.js is an up-and-coming JavaScript framework built on React and Next.js. It is a full-stack, opinionated framework—meaning that it makes certain assumptions about how to structure your JavaScript applications. Perhaps the most interesting aspect of Blitz is its so-called zero-API approach, wherein the framework does the work of connecting the user interface to the back-end datastore.
Let’s get a hands-on tour of this interesting and unique take on JavaScript application development.
Set up the Blitz demo
To begin, add Blitz as a global NPM package with the command: npm i blitz@alpha -g. Now, you can use the tool to create a new project by typing: blitz new demo-app. Listing 1 shows my setup for the demo application.
Listing 1. Create a new Blitz application
$ blitz new demo-app
✔ Pick which language you'd like to use for your new blitz project › Javascript
✔ Pick which template you'd like to use for your new blitz project › full
✔ Install dependencies? … yes
✔ Pick which form you'd like to use for your new blitz project › React Hook Form
Hang tight while we set up your new Blitz app!
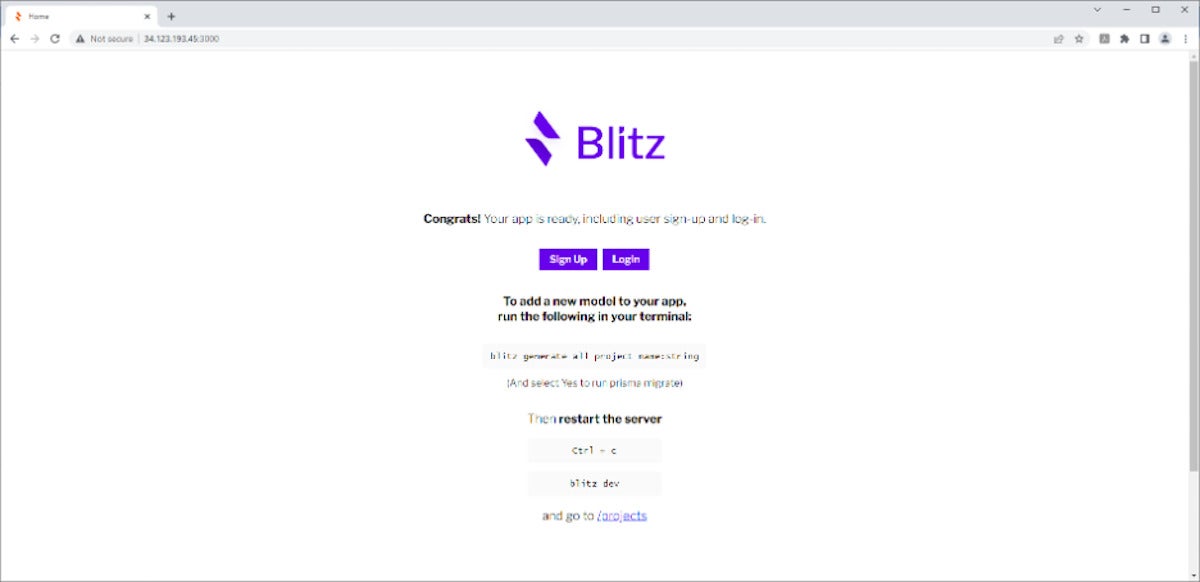
After Blitz finishes installing all of its dependencies, you can move into the new directory that's just been created, cd demo-app, and start the development server with the command blitz dev. The server is now running at localhost:3000, and you’ll get a welcome screen like the one shown here:
 IDG
IDG
Figure 1. The Blitz welcome screen.
The first thing you may notice is that unlike most front-end frameworks, Blitz’s generator provides more elaborate full-stack scaffolding; in particular, there is support for user creation and logins. If you play around with these features, you’ll see that you can create a user and log them in and out.
Add a model
Now let’s do as the welcome page suggests and add a model via the command-line. Go to the command-line and hit CTRL-C to stop the development server. Enter blitz generate all project name:string. This command tells Blitz to add a new model object, called project, with a single string field called name.
Migrate the database via Prisma
When prompted, confirm that you want to run prisma migrate dev. Blitz has installed and is using the file-based SQLite database, which is mapped via Prisma, the object-relational mapping (ORM) layer. SQLite and Prisma are where and how data objects are persisted. The prisma migrate dev command informs Prisma to update itself to reflect changes in the dev database (the default database used for development).
Create a new project
When the generator completes, start the server again with the command blitz dev. Return to the browser and visit localhost:3000/projects. You’ll see a new user interface, which you can use to create a new project. (Hit Create Project.)
If you are not logged in when you attempt to create a new project, you’ll get the message: "Error: You are not authenticated." This confirms that authorization is already working.
Now log in as a user and try the Create Project option again. This time, you’ll be presented with a form that contains a single name field. You can create some projects and you’ll observe that Blitz is scaffolding a reasonable RESTful schema for you.
The localhost:3000/projects page gives you a list of projects, which you can click on to get the project details at localhost:3000/projects/<ID>. Note that you also can edit and delete: a complete CRUD round-trip experience.
Layout of a Blitz project
Let's take a look at the project layout in Blitz. This gives us a sense of how Blitz manages to do so much for us.
/project-root/db/db.sqlite: The SQLite engine and schema/schema.prisma: The Prisma ORM mappings/migrations: The directory showing the migrations (useful for rollbacks)
/mailers: Contains stubs for configuring mailers like the Forgot Password mailer/jest.config.js: The JEST testing framework config/next.config.js: The Next.js config file/pages: The React.js and Next.js front-end files/api: Support for external (non-Blitz) API access/auth: The log in, log out, and signup pages/projects: Pages for theprojectentity. Other objects follow the same pattern.
/test: Test files (JEST)/app: App infrastructure/blitz-client.js: The client-side config/blitz-server.js: The server-side config/core: The components, hooks, and layouts for the application/projects: The queries, mutations, and components for theprojectobject/authand/user: Auth related queries, mutations, and components
/integrations: Third-party integrations like Auth0 and Sentry/package.json: The Node config file including Blitz scripts likedev/public: Static files likefavicon
RPC in Blitz.js
The most unusual thing about Blitz is its use of remote procedure calls, or RPC. Instead of using a REST or GraphQL API, you import your server-side code directly into your client-side JavaScript. Blitz then transforms the server-side code into an RPC call. You can access the server-side code directly from your client-side JavaScript, and Blitz will wire the network interactions to make it all work.
Now, let's open the file at blitz-demo/pages/projects/[projectId]/edit.js. Note that the square bracket syntax is how Next.js handles path slugs. (The projectID variable will be exposed to the page that handles the request, holding the value of the parameter at that position in the path.)
Listing 2 has the main significant parts of the Blitz demo.
Listing 2. Projects edit.js
import { Suspense } from "react";
import Head from "next/head";
import Link from "next/link";
import { useRouter } from "next/router";
import { useQuery, useMutation } from "@blitzjs/rpc";
import { useParam } from "@blitzjs/next";
import Layout from "app/core/layouts/Layout";
import getProject from "app/projects/queries/getProject";
import updateProject from "app/projects/mutations/updateProject";
import { ProjectForm, FORM_ERROR } from "app/projects/components/ProjectForm";
export const EditProject = () => {
  const router = useRouter();
  const projectId = useParam("projectId", "number");
  const [project, { setQueryData }] = useQuery(
    getProject,
    { id: projectId },
    { staleTime: Infinity }
  );
  const [updateProjectMutation] = useMutation(updateProject);
  return (
    <>
      <Head>
        <title>Edit Project {project.id}</title>
      </Head>

      <div>
        <h1>Edit Project {project.id}</h1>
        <pre>{JSON.stringify(project, null, 2)}</pre>

        <ProjectForm
          submitText="Update Project" initialValues={project}
          onSubmit={async (values) => {
            try {
              const updated = await updateProjectMutation({
                id: project.id,
                ...values,
              });
              await setQueryData(updated);
              router.push({
                pathname: `/projects/[projectId]`,
                query: {
                  projectId: updated.id,
                },
              });
            } catch (error) {
              console.error(error);
              return {
                [FORM_ERROR]: error.toString(),
              };
            }
          }}
        />
      </div>
    </>
  );
};

const EditProjectPage = () => {
  return (
    <div>
      <Suspense fallback={<div>Loading...</div>}>
        <EditProject />
      </Suspense>

      <p>
        <Link
          href={{
            pathname: "/projects",
          }}
        >
          <a>Projects</a>
        </Link>
      </p>
    </div>
  );
};

EditProjectPage.authenticate = true;

EditProjectPage.getLayout = (page) => <Layout>{page}</Layout>;

export default EditProjectPage;
First, notice that the import lines give us a good sense of how Blitz works: the demo imports a blend of React.js, Next.js, and Blitz.js libraries, along with project-specific components and the RPC generated by Blitz.
The form itself is pulled in from app/projects/components/ProjectForm.js, which descends from app/core/components/Form.js. Form.js extends the react-hook-form library, which does the heavy lifting of making the form work. Also, notice that the form is prepopulated with the attribute: initialValues={project}. How does the page first get ahold of the project object?
The project object is populated via the useQuery hook (which comes from Blitz), with the line const [project, { setQueryData }] = useQuery{...}. The project variable is set as the one that will ultimately hold the result of the useQuery hook. The setQueryData is a function from Blitz that updates the cache for the object, causing it to execute.
The useQuery hook relies on the getProject function, parameterized with the projectId value from the path. The getProject function comes from app/projects/queries/getProject.js. If you follow the thread, you'll see that getProject.js relies on a call to the db object, which Blitz creates and exports in the /d directory. Listing 3 shows how the getProject call is fulfilled.
Listing 3. getProject.js
import db from "db";
//...
const project = await db.project.findFirst({
    where: {
      id: input.id,
    },
  })
So, the db object exposes a query API on the project member. Here, we are using it to find the project via the criteria API, using that projectId parameter we passed back. The db API is mainly the Prisma library, which Blitz decorates with some helpers.
Mutating an object proceeds along similar lines to object creation and querying, with the views relying on the Blitz infrastructure that ties the front end to the back end without requiring explicit API calls.
Authentication
If you look at projects/create.js to see how the authentication is handled there, you’ll notice that the exported page is set with an authenticate field set to true, as shown in Listing 4.
Listing 4. Securing a page
NewProjectPage.authenticate = true;
export default NewProjectPage;
Once again, Blitz hides a lot of work and detail from us. Similarly, in the main pages/index.js, the current user is retrieved by the useCurrentUser hook. In the case of queries and mutations, the ctx object is automatically passed in as an argument, holding the session object. You can see this later functionality in action with the queries/getProject.js file, which secures the call by checking ctx.session.$isAuthorized().
Conclusion
Blitz is a unique and powerful take on the full-stack framework. It does a huge amount of work under the hood, without completely obfuscating these underlying operations. Once you understand Blitz.js and its idioms, development can proceed quickly along many happy paths like constructing CRUD around basic object graphs and performing straightforward authorizations.