


Unit testing is the process that tests units of code to check if it conforms to the accepted results. Unit tests are written to test blocks of code to validate if the tests produce the desired results. There are some open source frameworks available to unit test .Net applications, namely, NUnit and xUnit.Net. In this post, I will present a discussion on the fundamental concepts in unit testing and a glimpse at the unit testing frameworks available to write unit tests for applications developed in .Net. In my future posts here, I will discuss more on unit testing, test driven development, and mock and stub objects. So, stay tuned for more!
Why should I need unit tests?
Unit tests are methods that are written to validate an unit or block of code. You would typically want to write unit tests to validate if the actual results from your unit tests match with the desired results. If they match, we say that the test has passed, failed, otherwise. Unit testing if used properly in the development cycle of any application would ensure that there are less errors in the application. In essence, unit testing is a discipline adopted by the developers to minimize errors while the application is being developed. Unit testing is an integral part of the software development life cycle and helps you to verify any implicit and explicit assumptions made by your code. Test driven development or Test first development (TDD) is an approach in which you write unit tests before you write the actual code. Once your unit tests are in place, you would need to write code to pass these unit tests. TDD is a proven methodology to effective unit testing. I would discuss more on TDD in my future posts here.
NUnit
NUnit is a free unit testing framework widely used by .Net developers. It is the .Net counterpart of the Java unit testing framework called jUnit. To work with NUnit you would need to install the NUnit unit testing framework through NuGet package manager in your Visual Studio IDE. You can also execute unit tests written using NUnit using the NUnit GUI application -- it provides many options and is fast. However, I would always prefer to run my unit tests from within the Visual Studio IDE -- I find it a bit annoying to switch back and forth between Visual Studio and the NUnit GUI interface.
The following piece of code shows how you can use NUnit to write unit tests.
[TestFixture]
public class TestClass
{
[TestCase]
public void SampleTest()
{
Assert.AreEqual(10, Sum(5, 5));
}
private int Sum(int x, int y)
{
return x + y;
}
}
Microsoft Unit Testing Framework
To get started working with unit tests using the Microsoft unit test framework, you should first create a unit test project. To create a test project in Visual Studio, follow these steps.
- On the File menu, select Add -> New Project
- In the New Project dialog, select Visual c# and choose Test
- Select Unit Test Project from the list of the templates
- Specify a name for the unit test project and click OK
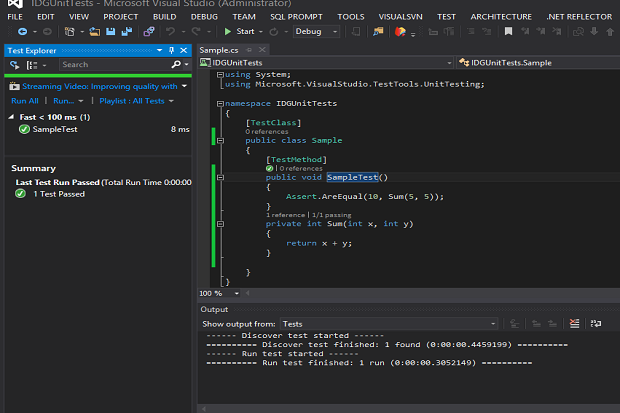
And, you are done! You can now go ahead and write your unit tests. The Test Explorer in your Visual Studio IDE can be used to view the passed or failed tests and execute one or more unit tests.The following piece of code illustrates a test class that leverages the Microsoft Unit Testing framework.
[TestClass]
public class Sample
{
[TestMethod]
public void SampleTest()
{
Assert.AreEqual(10, Sum(5, 5));
}
private int Sum(int x, int y)
{
return x + y;
}
}
xUnit.Net
You can know more on xUnit.Net from this link: http://xunit.github.io/
The following piece of code shows how a unit test class looks like when using xUnit.Net.
using Xunit;
namespace IDGTests
{
public class Sample
{
[Fact]
public void SampleTest()
{
Assert.Equal(10, Sum(5, 5));
}
private int Sum(int x, int y)
{
return x + y;
}
}
}
After you have added the xUnit.Net unit testing framework through NuGet package manager in Visual Studio and written your unit test class with the test methods, the next step is to include a reference to the xUnit.Net console runner. To do this, you would need to take advantage of NuGet package manager again and install the package named xunit.runner.visualstudio. Once you have installed this package, you can execute the tests you have written using the xUnit.Net unit testing framework from within the Visual Studio IDE.
Note that xUnit.Net provides support for two types of unit tests, namely, Facts and Theories. While the former implies tests that test invariant conditions, the latter refers to unit tests that are true for a particular set of data. You can refer to this documentation for more information on how you can execute xUnit.Net unit tests in Visual Studio.