


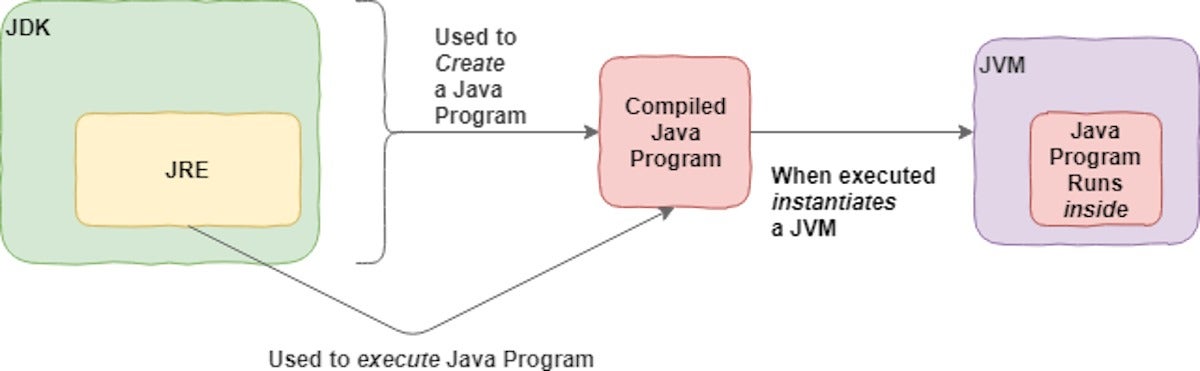
The Java Development Kit (JDK) is one of three core technology packages used in Java programming, along with the JVM (Java Virtual Machine) and the JRE (Java Runtime Environment). It's important to differentiate between these three technologies and understand how they're connected:
- The JVM is the runtime that hosts running programs.
- The JRE is the on-disk part of Java that creates the JVM and loads programs into them.
- The JDK provides the tools necessary to write Java programs that can be executed and run by the JVM and JRE.
Developers new to Java often confuse the Java Development Kit and the Java Runtime Environment. The distinction is that the JDK is a package of tools for developing Java-based software, whereas the JRE is a package of tools for running Java code.
The JRE can be used as a standalone component to simply run Java programs, but it's also part of the JDK. The JDK requires a JRE because running Java programs is part of developing them.
Figure 1 shows how the JDK fits into the Java application development lifecycle.
 IDG
IDG
Figure 1. A high-level view of the JDK.
Before we move on, let's consider the technical and everyday definitions of the JDK:
- Technical definition: The JDK is an implementation of the Java platform specification, which includes the compiler and standard class libraries.
- Everyday definition: The JDK is a software package you download in order to create Java-based applications.
JDK versions and packages
Getting Java set up in your development environment is as easy as downloading a JDK and adding it to the system path on your operating system. For Windows and macOS, Java includes an installer that will do this for you.
When you download your JDK, you will need to select the version of Java you want to use. Java 11 recently squeaked past Java 8 as the most commonly used version. Looking ahead, it seems that Java 17 may be the next prominent version. Java maintains backward compatibility, so we'll just download the latest release.
In the past, you also had to select a Java package. These were JDKs targeted for different types of development like Java Enterprise Edition (Java EE), Java Standard Edition (Java SE), and Java Mobile Edition (Java ME). Now that the enterprise Java libraries have migrated to Jakarta EE, the process has changed. You will still download the Java SE JDK from an implementer like Oracle or OpenJDK. If you need additional tools useful for enterprise and cloud-native application development, then you will likely want to download and install Jakarta EE. In some cases, you might not need the entire Jakarta EE platform. For example, if you needed just a JDK plus servlets, you could use the standard JDK plus Tomcat, which includes the Servlet API.
Download the JDK for Java SE
We'll stick with Java SE for this introduction so that we can focus on the core JDK classes and technologies. To download the Java SE development kit, visit Oracle's official download page. You'll see the various JDK packages available, as shown in Figure 2.
 IDG
IDG
Figure 2. Available JDK packages.
Before you select the Java SE download, take a minute to look at the other options. There's a lot cooking in the Java kitchen!
How to install the JDK
There are two flavors of JDK installation: manual or installer. In a manual install, you download the binaries, extract them, and add them to the path. This is common with all operating systems. You probably know how to perform this type of installation.
Installers are available for macOS and Windows. When you run a JDK installer, you’ll be given a selection of three components: Development Tools, Source Code, and Public JRE. You may install one or all of them. In this case, just select the default.
Installing the Development Tools option gives you the JDK proper. Installing Source Code contains the sources for the public classes in the core Java API. Including this option allows you to reference the source code when building applications. The third option, Public JRE, drives home that the JDK and JRE are separate entities: the public JRE can be used by other programs to execute Java programs, and can be installed separately from the JDK.
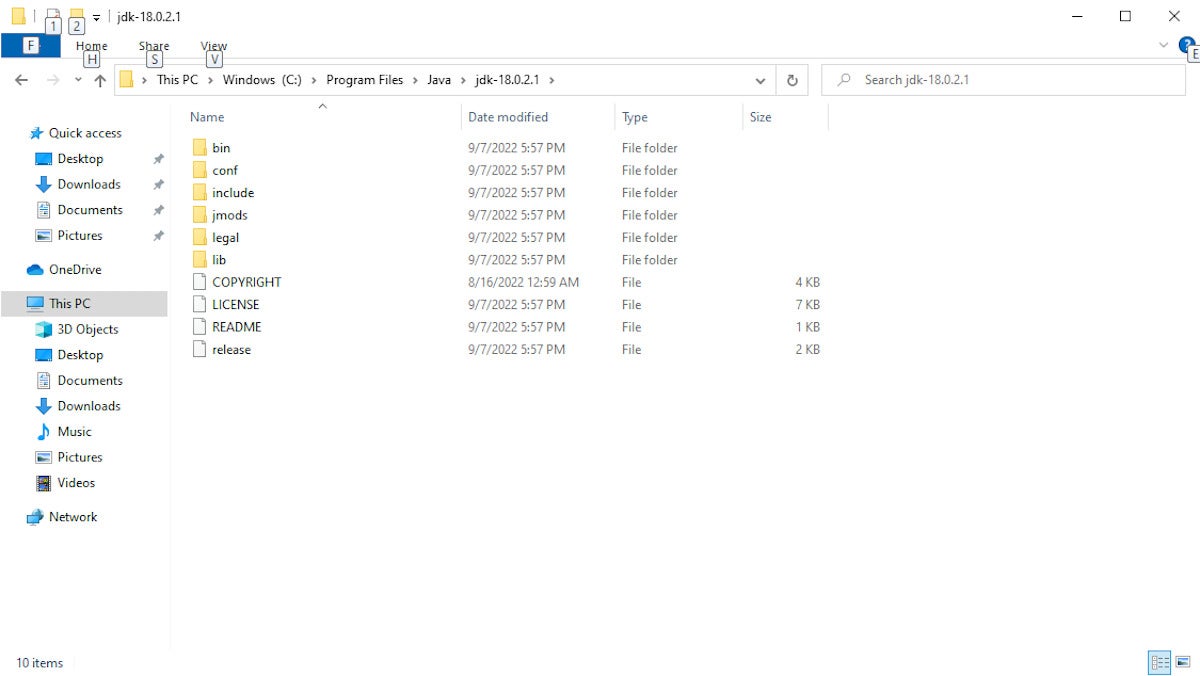
Go ahead and install all three components and accept the defaults for each one. Doing this means your JDK and JRE will be installed in the default location for your operating system. On Windows, that's C:\Program Files\Java\jdk-*, as shown in Figure 3. (In older versions of Java, the JDK and JRE had separate directories. In more recent versions, they are installed together inside the JDK directory.)
 IDG
IDG
Figure 3. A view of the installed JDK.
Two key Java commands: java and javac
The JRE inside your JDK adds the java command to your command line. You can verify this by dropping into a command shell and typing java -version, which should return the Java version you've just installed. (In some cases you'll have to restart your system for this change to your system path to fully take.)
It's good to have java installed, but what about javac? You'll need this JDK component to compile your Java files.
The javac command lives inside the /jdk directory, and in recent versions of the installer will automatically be added to the path .... Some IDEs include a Java compiler by default. It is usually possible to configure them to use a specific installed version if you wish.
Compile and run a Java program
We'll start by compiling and running a Java program the old-fashioned way—with text files and console commands. This gives us a good sense of what’s actually happening.
Step 1. Write a simple Java program
Create a new text file, called Intro.java and place it somewhere on your computer, like in your documents folder.
Next, add the code from Listing 1, which is a very simple Java program.
Listing 1. Intro.java
public class Intro {

    public static void main(String[] args) {
        System.out.println("Welcome to the JDK!");
    }

}
Step 2. Compile with the JDK
Next, use the JDK compiler to turn your text file into an executable program. Compiled code in Java is known as bytecode, and carries the .class extension.
You'll use the javac command, passing the Intro.java file as the argument to the command. You are feeding the Java file we created in Listing 1 into the javac command. On my system, that looks like Listing 2. (In older Java versions, you’ll need to type the full path to the command into your command shell as in the commented line.)
Listing 2. Compile with the JDK
javac Intro.java
//"C:\Program Files\Java\jdk-10.0.1\bin\javac.exe" Intro.java
That should result in a successful compile. The javac will not respond with a success message; it will just output the new file. Any errors will result in console output.
Step 3. Run the .class file
You should now see the Intro.class file in the same directory as Intro.java.
You can run it by typing: java Intro, which will result in the output shown in Listing 3. Note that you don't include the .class when typing this command.
Listing 3. Running Intro.class
C:\Users\mtyson\Documents>java Intro
Welcome to the JDK!
Create a JAR file and add it to your classpath
The javac is the star of the JDK, but the /bin directory contains other tools you will need. Probably the most prominent after javac is the jar tool.
A JAR (.jar) file is a packaged set of Java classes. Once the compiler has created the .class files, the developer can put them together in a .jar, which compresses and structures them in a predictable fashion.
Let's convert Intro.class to a .jar file.
Navigate back to the directory where you placed your Intro.java, and type the command you see in Listing 4.
Listing 4. Create a JAR file
C:\Users\mtyson\Documents>"c:\Program Files\Java\jdk-10.0.1\bin\jar.exe" --create --file intro.jar Intro.class
Now you'll see an intro.jar file in the directory. You can make use of the .jar by adding it to your classpath and executing the program inside, as shown here:
Listing 5. Add the JAR to your classpath
java -cp intro.jar Intro
The -cp switch tells Java to add the jar to the classpath. A .jar file is more than we need for this tiny program, but they're indispensable as programs grow in size and rely on third-party packages.
The JDK in your IDE
An integrated development environment (IDE) is software that provides a cohesive set of tools for developing applications. Think of an IDE as a visual operating system that includes a file browser and text editor, along with capabilities specific to development like code completion and formatting. Eclipse, IntelliJ, and NetBeans are all well-tested and powerful Java IDEs. Microsoft's ubiquitous Visual Studio Code (VS Code) is another capable contender for Java application development.
In Java development, one of the key things the IDE does is manage compilation. That is, the IDE automatically runs the compile process in the background so you don't have to continually do it yourself. An IDE also provides play-by-play feedback as you go, catching coding errors on the fly.
You've seen how the JDK works on the command line, so now Let's take a quick look at how it works in Eclipse.
Eclipse and the JDK
Installing Eclipse is outside the scope of this guide, but it's a simple process. Eclipse includes an installer like any other program, and you can find the right installer for your operating system here.
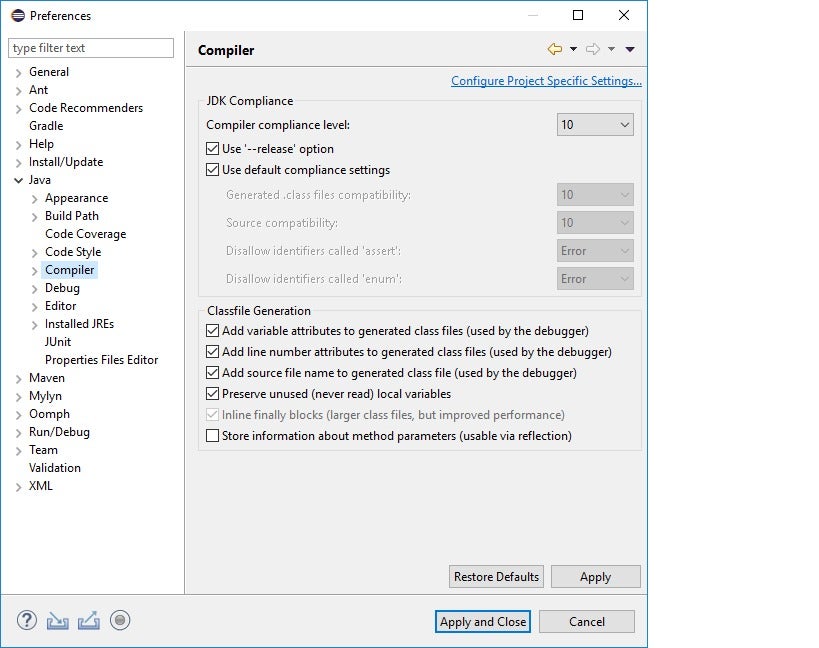
With Eclipse installed, open the Window item from the menu bar and select Preferences.
Inside the Preferences window, you'll see the Java item. Open it, and inside you'll see the Compiler item. Clicking that will reveal options for the JDK.
Figure 4 shows a screenshot of the JDK options in Eclipse.
 IDG
IDG
Figure 4. JDK options in Eclipse.
As previously mentioned, you will need to select the correct JDK version for your project. Under the hood, the IDE will run the JDK compiler, just as you ran it from the command line. The Eclipse IDE also has its own JDK instance. The IDE manages the JDK and JRE for you, which makes life much easier!